

Introduction
2020 marked the largest increase of people working from home and shopping online. But while this transition benefited online retailers and remote workers, it also made it a lucrative period for cyber criminals.
More online transactions meant more opportunities to hack credit card data, while more people working remotely opened up new ways for criminals to target both individuals and organizations.
80% of firms have seen an increase in cyberattacks in 2020 alone. It’s become crucial to authenticate your application’s users beyond the regular username and password phase.
This article will teach you how to use TypingDNA to implement 2 and Multi-Factor Authentication in your Laravel Project giving your application an extra method of authentication — making it more difficult for cyber criminals to impersonate your users.
Implement Laravel 2Factor Authentication
Implementing TypingDNA with Laravel is easy. Just follow these 4 simple steps:
- Laravel Authentication Setup
- TypingDNA Client Setup
- Laravel Backend
- Laravel Frontend
- Verification Process
Laravel 2 Factor Authentication Setup
For more information about Laravel please follow this Laravel Tutorial: The ultimate guide 2021.
Let’s get started by creating our first laravel project using the following command:
composer create-project laravel/laravel typingdna-verify-2faNavigate to the typingdna-verify-2fa directory and start your development server.
cd typingdna-verify-2fa && php artisan serve
You can now test your setup by accessing link: http://127.0.0.1:8000 .
Set up the Database
After installing Laravel, the next thing is to configure and set up your database. Let’s create a database using any of these database clients of your choice and keep a note of the login details.
Now, open the .env file and update the following information.
DB_CONNECTION=mysql
DB_PORT=3306
DB_HOST=127.0.0.1
DB_USERNAME=DB USERNAME HERE
DB_DATABASE=DB NAME HERE
DB_PASSWORD=DB PASSWORD HERE
Set up Laravel 2 factor authentication
Laravel makes it very easy to set up authentications by automatically generating authentication pages and setting up the logic properly with a few simple commands.
With the use of Laravel Breeze, the authentication process is made very easy and less time-consuming.
composer require laravel/breeze --dev
php artisan breeze:install
npm install
npm run dev
After running those commands, your authentication process is good to go. Simply navigate to http://127.0.0.1:8000/register or http://127.0.0.1:8000/login.
Now that we have our normal authentication process adequately configured, let’s move on to configuring and setting up TypingDNA for Multi-Factor authentication.
TypingDNA Client Setup
Next we will set up the TypingDNA Verify settings.
- Create an account on typingdna.com. The Verify 2FA dashboard will provide you with the clientID, secret and applicationID.
- Setup ngrok. Ngrok creates a public url that will link to your localhost environment. For security purposes, TypingDNA Verify 2FA will only run on a public url. Ngrok can be downloaded from the following link: https://ngrok.com/.
Navigate to the folder where you have downloaded ngrok and run the command:
ngrok.exe http 8000
A bridge will be created that will forward to our localhost.
Now we can test that our solution runs by running the ngrok link, in our case: https://9296-35-204-65-198.ngrok.io (make sure to always use the https version).
Laravel Backend
Now we will set up the backend of TypingDNA Verify. We will navigate to the app folder and create another folder called “Services”. Inside we will create the TypingDNA.php file.
We will create our first function getDataAtributes that will help us generate the TypingDNA Verify button.
public function getDataAttributes() {
    $typingDNAVerifyClient = new TypingDNAVerifyClient(env('TYPINGDNA_CLIENID'), env('TYPINGDNA_APPID'), env('TYPINGDNA_SECRET'));
    $typingDNADataAttributes = $typingDNAVerifyClient->getDataAttributes([
        "email" => env('TYPINGDNA_EMAIL'),
        "language" => "EN",
        "flow" => "STANDARD",
    ]);
    return  $typingDNADataAttributes;
}
We will set up the private and public keys in the .env environment.
Make sure to add in in the App\Services folder the file TypingDNAVerifyClient.php that can be found in our repository: https://github.com/TypingDNA/TypingDNA-Verify-Client/blob/main/php/TypingDNAVerifyClient.php.
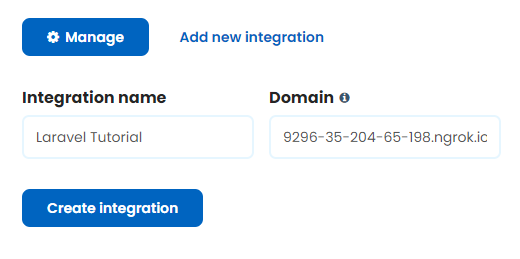
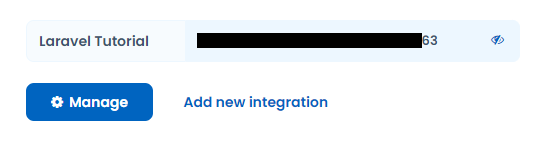
To generate the ApplicationID navigate to the Verify 2FA settings and add a new integration:
Now that we have generated the function that will generate the button we need to validate if the OTP that we receive back is correct.
public function getResult($otp) {

    $typingDNAVerifyClient = new TypingDNAVerifyClient(env('TYPINGDNA_CLIENID'), env('TYPINGDNA_APPID'), env('TYPINGDNA_SECRET'));

    $response = $typingDNAVerifyClient->validateOTP([
        'email' =>env('TYPINGDNA_EMAIL'),
    ], $otp);

    if ($response['success'] == 1)
        return "Authentication Successful";
    else
        return "Authentication Failed";

}
Laravel Frontend
Next, we will add the TypingDNA Verify 2FA button on our frontend. We will use the dashboard for the simplicity of the implementation.
First we will import the following javascript in order to generate the TypingDNA Verify pop-up. We will place it under the head tag:
<script src = "https://cdn.typingdna.com/verify/typingdna-verify.js"></script> Next we will add the TypingDNA Verify button that will use the attributes that we will generate in the backend.
<button
    class = 'typingDNA-verify'
    data-typingdna-client-id='{{ $clientId }}'
    data-typingdna-application-id='{{ $applicationId }}'
    data-typingdna-payload='{{ $payload }}'
    data-typingdna-callback-fn= 'callbackFn'> Verify with TypingDNA
</button>
The button will call a callback function once the process is completed. This function will also contain the OTP generated.
We will handle this function by redirecting the user to another page with the OTP as one of the parameters. We will do with the following javascript function that we will add in the header.
<script>
    function callbackFn({otp}) {
        window.location.href = `/result?otp=${otp}`;
    }
</script>
Next we will create the result page:
Under routes/web.php we will add the following code that will read the OTP parameter.
Route::get('/', function () {
    return view('welcome', [ 'clientId' => app('App\Services\TypingDNA')->getDataAttributes()['clientId'],
    'applicationId' => app('App\Services\TypingDNA')->getDataAttributes()['applicationId'],
    'payload' => app('App\Services\TypingDNA')->getDataAttributes()['payload']]  );
});

Route::get('/result', function(Request $request) {
    $otp = $request->input('otp');
    return view('result', ['result' => app('App\Services\TypingDNA')->getResult($otp) ]);
});
We will create a copy of the welcome.blade.php and rename it to result.blade.php.
Replace the code of the button with the following code that will print if the authentication is successful or not:
{{ $result }}Setting up the verification process
Let’s test our application:
Access your ngrok link:
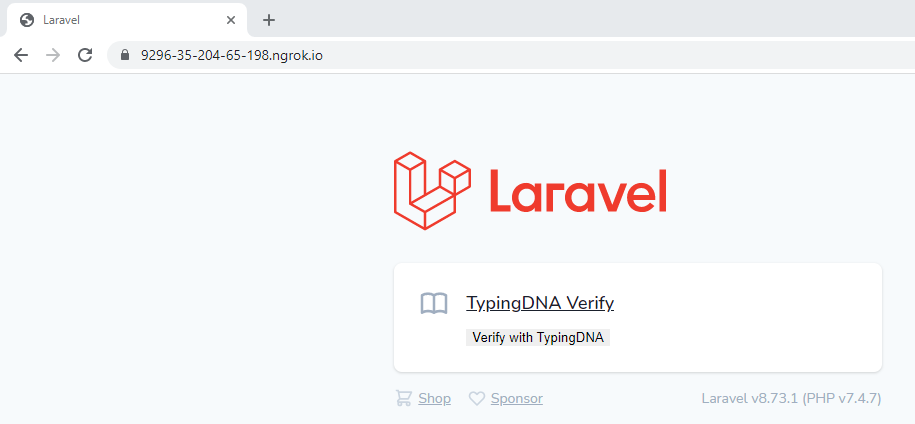
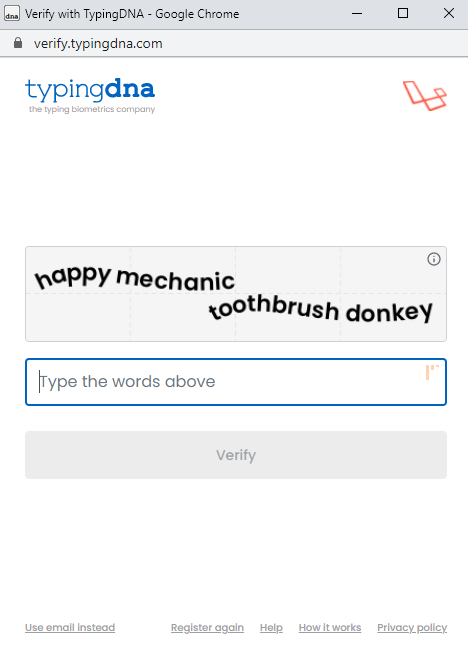
Select the button and type the 4 words that are presented on the screen:
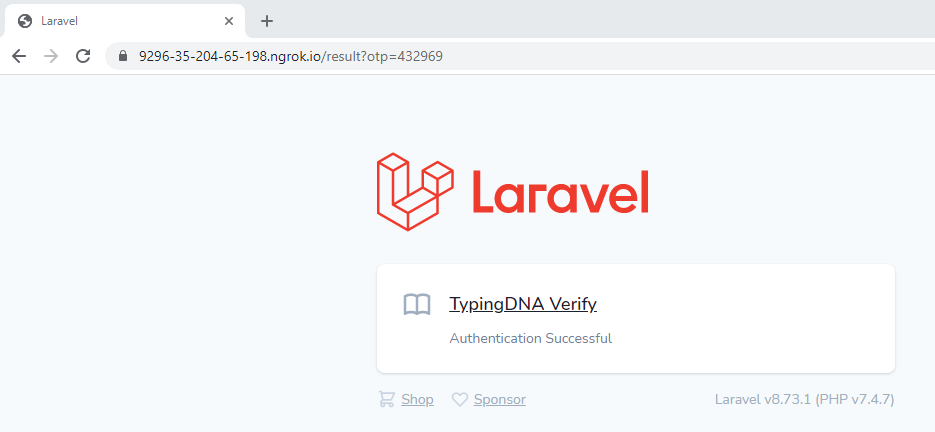
Next you will be redirected to the result page with the success message:
If you have more questions about TypingDNA Verify 2FA feel free to contact us at support@typingdna.com.